Tile&Bath is excited to present the ultimate guide to installing porcelain tiles for your home. Whether you're a seasoned DIY enthusiast or a first-time tiler, this comprehensive blog post will walk you through every step of the process, ensuring a flawless and professional-looking finish.
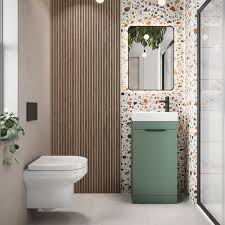
Porcelain tiles have become increasingly popular in recent years, thanks to their durability, versatility, and stunning aesthetic appeal. These tiles are renowned for their resistance to scratches, stains, and moisture, making them an ideal choice for high-traffic areas like kitchens, bathrooms, and entryways.
In this informative blog post, we'll cover everything you need to know about installing porcelain tiles, from preparing the surface to grouting and sealing. We'll also provide helpful tips and tricks to ensure a smooth and efficient installation process, saving you time, money, and headaches.
Preparing the Surface
The key to a successful porcelain tile installation lies in the preparation of the surface. Before you begin, it's crucial to ensure that the area is clean, level, and free of any debris or irregularities. This step is essential to prevent issues such as uneven tiles, cracking, or premature wear and tear.
Start by thoroughly cleaning the surface, removing any existing flooring, adhesive, or sealant. If the surface is uneven, you may need to use a self-leveling compound to create a smooth, flat base. Once the surface is prepared, you can move on to the next step.
Choosing the Right Adhesive
Selecting the appropriate adhesive for your porcelain tiles is crucial. Porcelain tiles are denser and less porous than traditional ceramic tiles, so you'll need to use a high-quality, modified thinset mortar that is specifically designed for porcelain.
Look for a thinset that is labeled as "porcelain-friendly" or "for use with porcelain tiles." These adhesives are formulated to provide a strong, long-lasting bond and are less likely to shrink or crack over time.
Laying the Tiles
With the surface prepared and the adhesive selected, it's time to start laying the tiles. Begin by laying a small section of tiles, using a notched trowel to spread the adhesive evenly across the surface. Carefully place the tiles, ensuring that they are level and properly spaced.
As you work, use a level to check the tiles and make any necessary adjustments. It's also important to stagger the tile joints to create a more visually appealing pattern.
Grouting and Sealing
Once the tiles are in place and the adhesive has had time to cure, it's time to grout the tiles. Use a high-quality, sanded grout that is specifically formulated for porcelain tiles. Apply the grout with a grout float, working it into the joints to ensure a smooth, even finish.
After the grout has had time to dry, it's important to seal the tiles to protect them from stains, moisture, and wear and tear. Look for a penetrating sealer that is designed for porcelain tiles, and follow the manufacturer's instructions carefully.
Maintenance and Care
Proper maintenance and care are essential to keep your porcelain tiles looking their best for years to come. Regularly sweep or vacuum the tiles to remove any dirt or debris, and use a pH-neutral cleaner to mop the surface.
Avoid using harsh chemicals or abrasive cleaners, as these can damage the tile surface and grout. If you notice any cracks or chips in the tiles, address them promptly to prevent further damage.
By following these steps and taking the time to properly install and maintain your porcelain tiles, you can enjoy a beautiful, long-lasting, and low-maintenance flooring solution for your home.
Conclusion
Installing porcelain tiles may seem like a daunting task, but with the right tools, materials, and knowledge, it can be a rewarding and satisfying DIY project. By following the steps outlined in this blog post, you can achieve a professional-looking result that will enhance the beauty and value of your home.
Remember, if you have any questions or need additional guidance, the team at Tile&Bath is always here to help. We're dedicated to providing our customers with the best products and support to ensure a successful tiling project.
Happy tiling!